
This post is also available in: Español (Spanish)
How to download the modules from our website
To download the modules from our shop at tienda.informax.es you must log in with your username and password to the private user area. In the upper area, click on “Login”:
This will take you to the login screen, where you will need to enter your customer details:

In case you do not remember your password, you have the possibility to recover it by clicking on “Forgot your password”. If you do not remember your customer email address, you can open a ticket from tickets.informax.es, where we can help you to recover your account.
Once you have entered your username and password, you will be taken to the following screen:
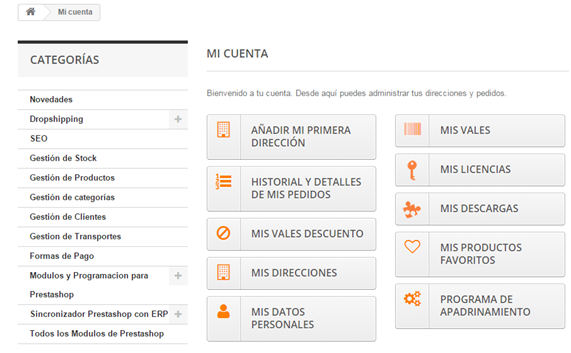
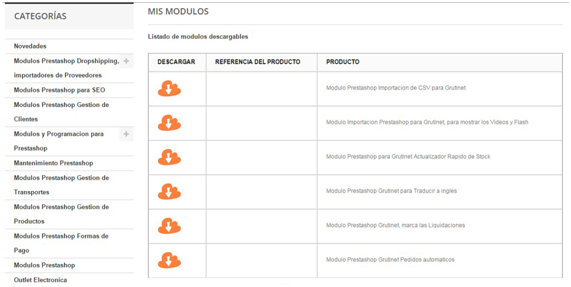
Here we can access to “My Downloads” where we will see available all downloads of modules purchased in our module shop for Prestashop.
In case you are not able to download, we remind you that we are available at tickets.informax.es, where you can ask for help or ask us about any technical problem you may have with the module.
If you like, you can also watch it on video:
How to generate the license for the Modules on the Informax site
Once we have purchased and completed the payment of our modules we will be able to generate the licence.
If it has not been done in the process of the purchase, from the customer area of our shop we have the possibility to generate it. To access the private area we must first enter the shop at tienda.informax.es, to do this we will go to the link that says “Log in”.
Once we have authenticated we will be shown the following screen:
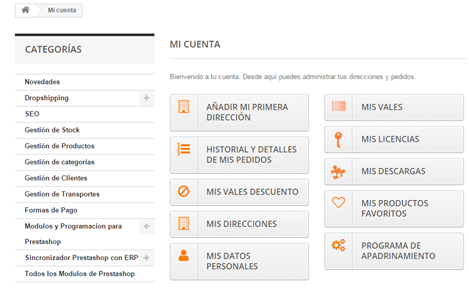
Here we go to the “My Licences” section which will take us to the next screen:
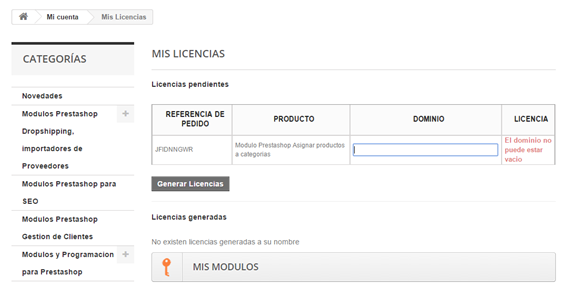
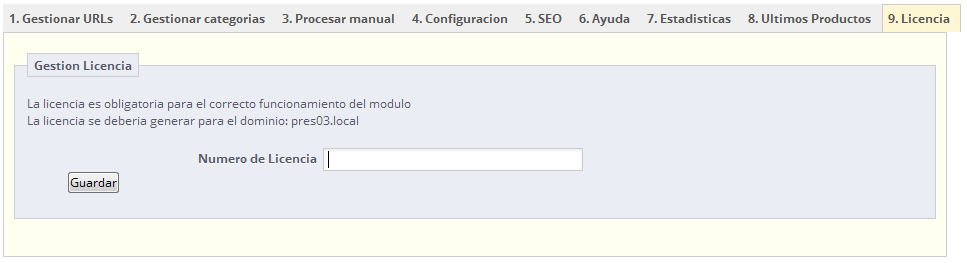
Here we are asked for the domain name that the module asks for when installing it in your shop. It is important that the domain name must be entered without http:// or https://, generating the licence for exactly the domain indicated in the module:

You have to copy the domain name as it is displayed on that page and comes after the text:
The License should be generated for the domain: ***.**********.***
You can also see it in the following video:
Installation of a module
Once we have generated the license and downloaded the module we can proceed to install the module in PrestaShop.
There are two ways to install a module:
- Installing it from Prestashop
- Using your FTP client.
Install from Prestashop
- We enter the PrestaShop Backend with our username and password.
- We go to the left, Modules section.
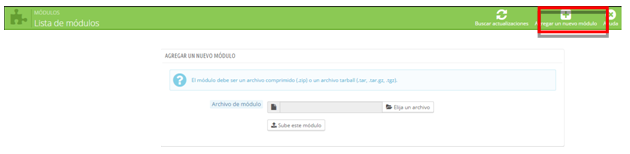
- We look for our module to install in the search engine or we can filter the results by modules not installed. In the case of not finding it in the search engine is because you have to add it.
- Choose the module and click on “Install” and then on “Continue installation”.

- The following window will appear informing us that the module(s) have been successfully installed and asking for the previously generated licence.
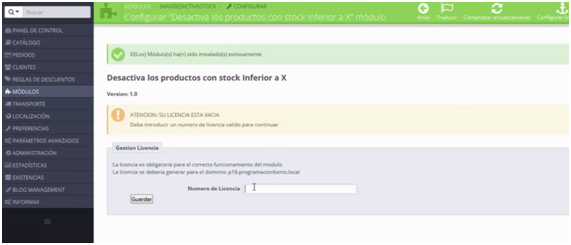
- Here we must enter the generated licence in order to continue with the configuration of the module and save.
Using the FTP method
To install a new PrestaShop module manually:
- Unzip the module file. This should result in a new folder.
- Using your FTP client, you must connect to your server where PrestaShop is hosted and place the unzipped module folder in the modules directory, /modules.
- Find the new module in the list of modules.
- In the new module, click on the “Install” button.
- Your module is installed and should be activated as well. If necessary, click on the “Configuration” link of the module.
Once the configuration is complete, be sure to test the module to make sure it works as intended. If you have any problem, you can request support at tickets.informax.es
REMEMBER: The module can be installed on your web server in public view or installed locally for testing, changes, updates and so on on your computer without the need to do it in your shop in production.
Configurating the module
Security Token
With this option we can generate a security token to prevent anyone from executing our tasks.

SQL Cron
If a product has been created by SQL statements, the triggers have not been executed, so the execution of this cron is necessary for the correct copy/move of the product to the necessary category.

Default action
With this option we indicate the actions to be carried out with the product categories.

The options are:
- Copy: an association of the product to the target category is created, keeping the product associated to the original category. If change category by default is activated, the product will have as default category the one we have selected as target category.
- Move: the original category of the product is removed and the product is now associated with the category we have selected as the target category.
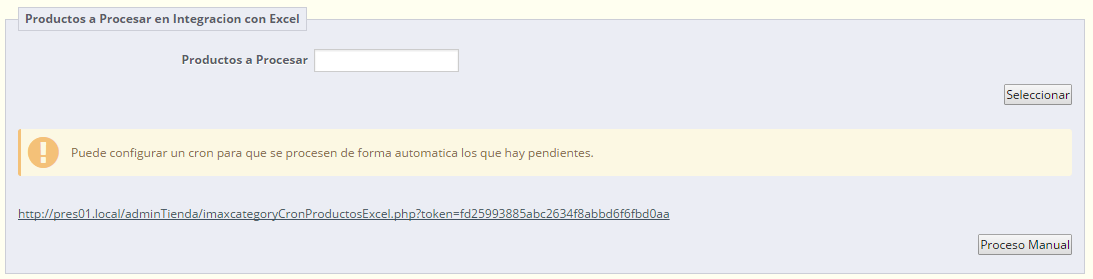
Products to be processed in excel integration
This option performs the category update process if an excel file with the category modifications has been imported.
This process can be done manually or by setting up a cron job.
Managing Categories
Select categories
This option shows all the categories of our shop divided into two groups:
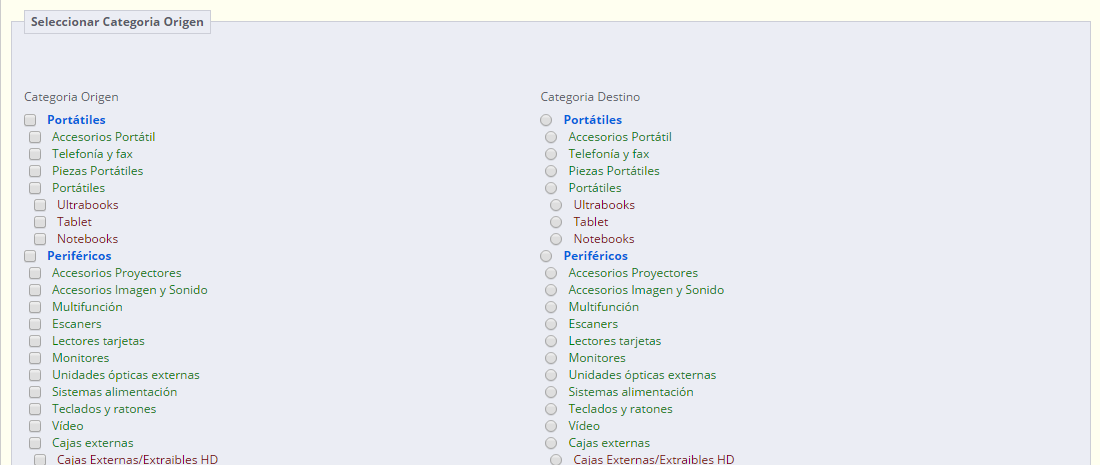
- Source categories: initial category of the product to be acted upon.
- Target category: category for which a product association is to be created.
Active mappings
Here you will see the rules you have activated on the categories.

Backing up
We have the possibility of making a backup copy of the mappings that we have configured. By entering this address in a browser we can download all the rules we have configured.

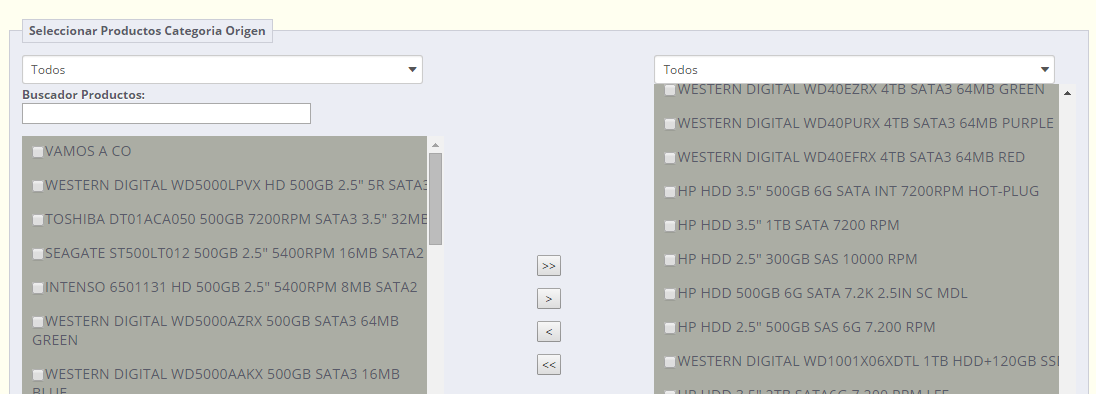
Selective movement
Within this option we can move specific products from one source category to another, i.e. not all the products in a category are moved, but only those that we select.
This option has the possibility of bi-directional navigation, I can choose products in the list on the left and assign them to categories in the list on the right and vice versa.
Movement by manufacturer
We have the possibility to move all the products of a manufacturer to a specific category. To do this, select a manufacturer in the drop-down menu on the left and a category in the drop-down menu on the right and all the products of this manufacturer will be moved/copied to the selected category.

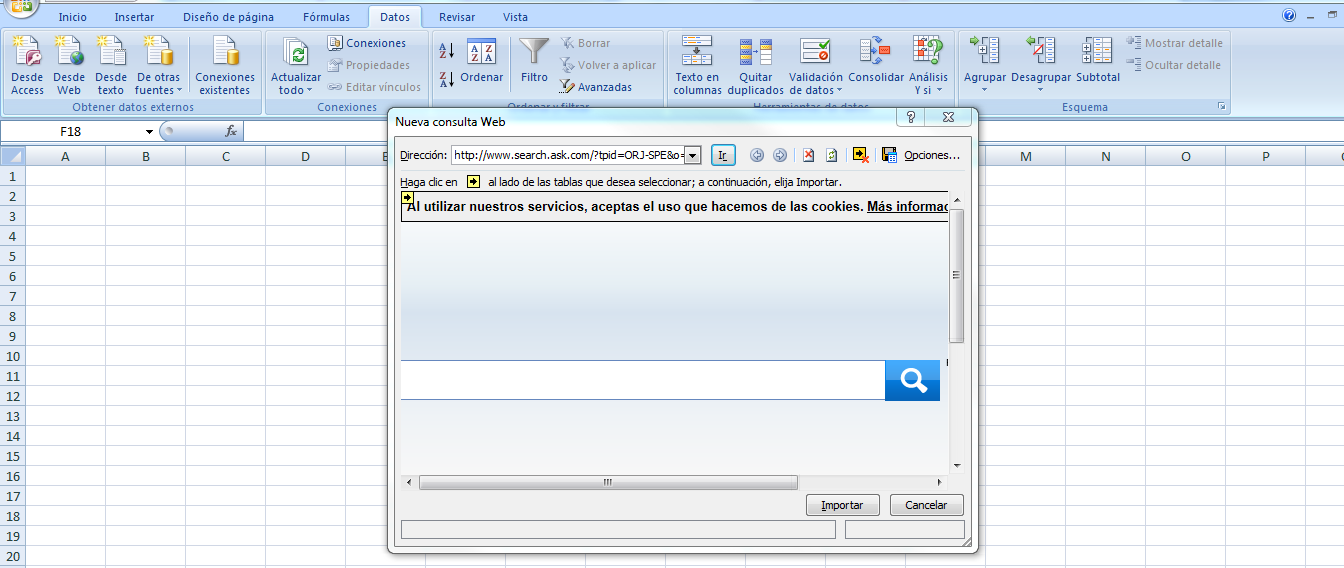
Integration with excel
With this option we can move products from category to category by exporting them to an excel workbook and making the changes there.

To export in our excel we go to the data tab and select: From web, a dialogue will open in which we can enter:
- Category IDs
- Products
In the categories file we will see all the categories in our shop. This is interesting to see the ids of the categories to assign them to the products. This file shows us:
- Category Id: the number identifying a category for our shop.
- Parent Category
- Category Name

In the product file we can observe:
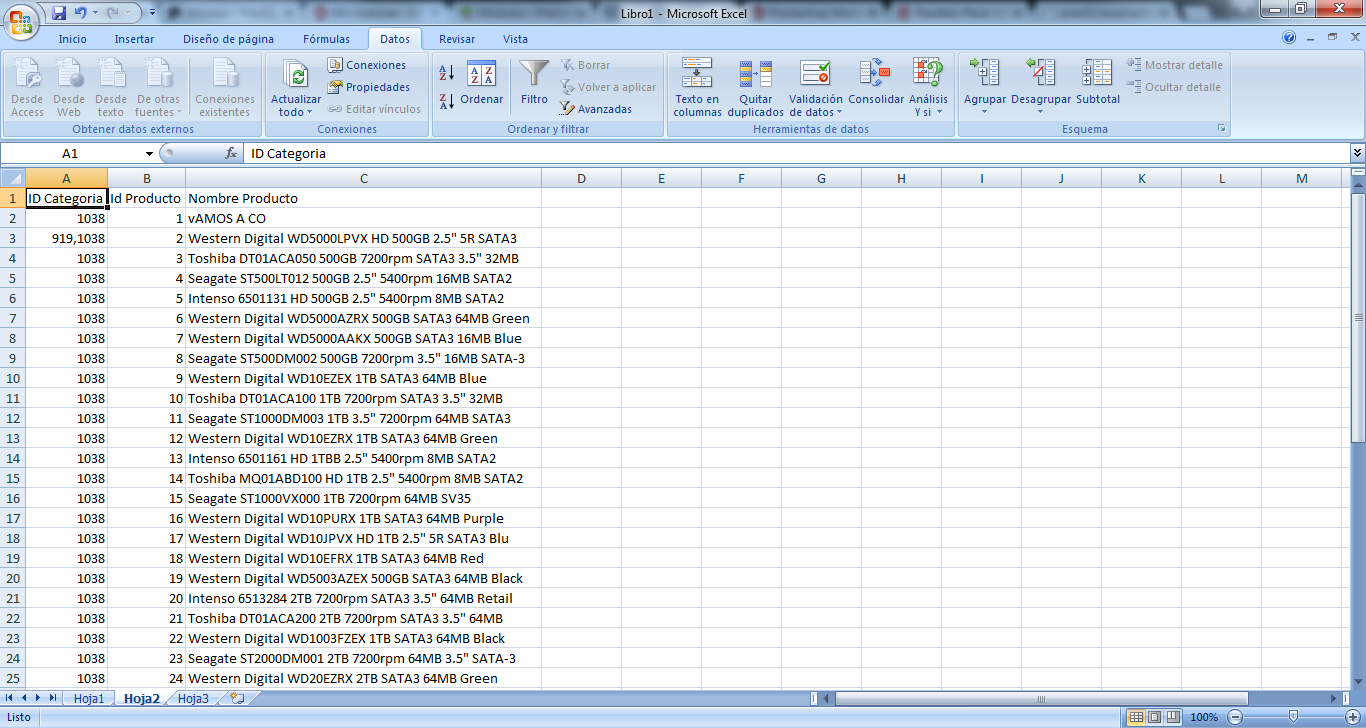
- Product ID
- Product Name
- Category ID: category to which the product is associated. In this field, separated by commas, we can enter the ids of the categories to which we want to manually associate the product. The first id entered is that of the product’s default category, the other ids entered will create an association for that product with the category whose id is indicated. Once the changes have been made, save the excel as tab-delimited text.
IMPORTANT: do not assign products to category id 1 because they will not be visible.
For all these changes to take effect we have to import the file with the changes to our module, for this we go to the following menu:

Once the file has been selected, the products to be updated will appear in the Configuration tab -> Products to be processed in integration with Excel. Here we can do the process manually or automatically.
The file must be saved in tab-separated txt format.
If you click on the video you can watch a tutorial of the module:
Licence
Here we introduce the licence number of our module. Remember that the licence is compulsory for the correct functioning of the module.


